
Christmas Images Drawing Easy 2024: A Step-by-Step Guide for Beginners
Related Articles: Christmas Images Drawing Easy 2024: A Step-by-Step Guide for Beginners
- Christmas Images Dogs 2024: Capture The Festive Spirit With Your Furry Friends
- Christmas Images Disney 2024: Capture The Magic Of The Holidays
- Christmas Images Desktop Wallpaper 2024: Capture The Festive Spirit On Your Screen
- Christmas Images Desktop 2024: A Festive Collection To Brighten Your Holiday Season
- Christmas Images Download Free 2024: Capture The Festive Spirit With Stunning Visuals
Introduction
In this auspicious occasion, we are delighted to delve into the intriguing topic related to Christmas Images Drawing Easy 2024: A Step-by-Step Guide for Beginners. Let’s weave interesting information and offer fresh perspectives to the readers.
Table of Content
Video about Christmas Images Drawing Easy 2024: A Step-by-Step Guide for Beginners
Christmas Images Drawing Easy 2024: A Step-by-Step Guide for Beginners

With Christmas just around the corner, it’s time to start thinking about how to decorate your home for the festive season. If you’re looking for a fun and easy way to add some Christmas cheer to your walls, why not try drawing some Christmas images?
In this step-by-step guide, we’ll show you how to draw a variety of Christmas images, from classic symbols like Santa Claus and reindeer to festive decorations like Christmas trees and ornaments. Even if you’re a complete beginner, you’ll be able to follow these simple instructions and create beautiful Christmas drawings that will add a touch of holiday magic to your home.
Materials You’ll Need:
- Paper
- Pencil
- Eraser
- Black marker
- Colored pencils or markers (optional)
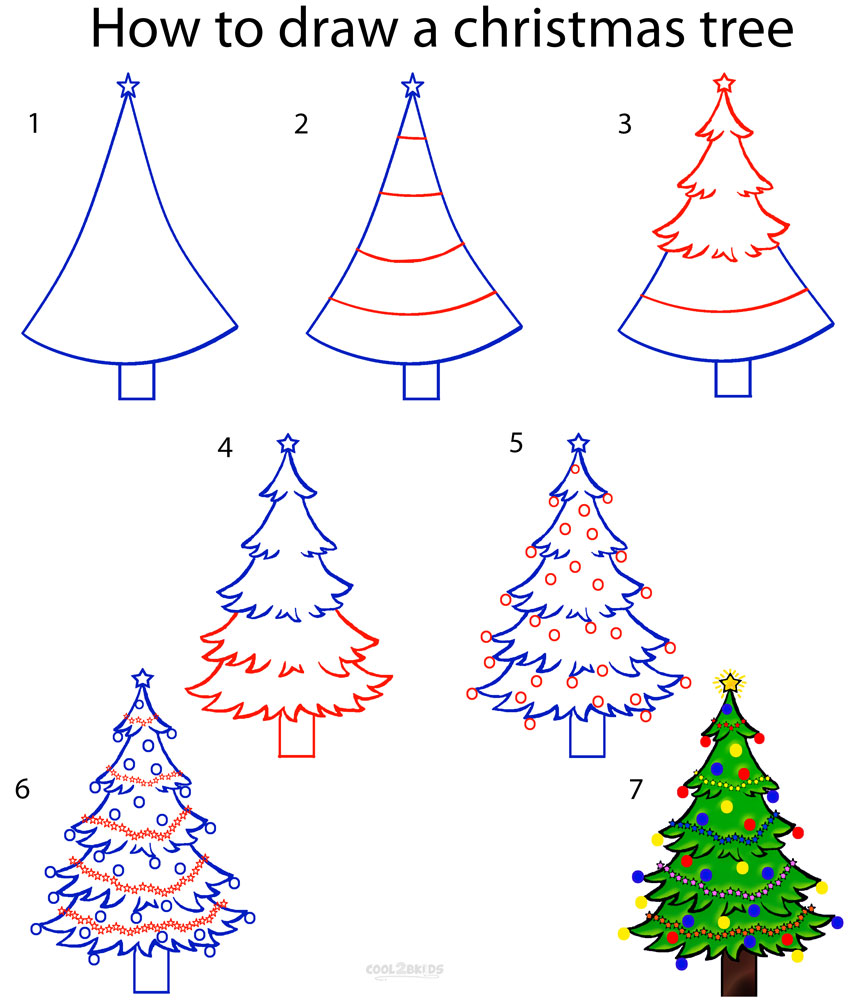
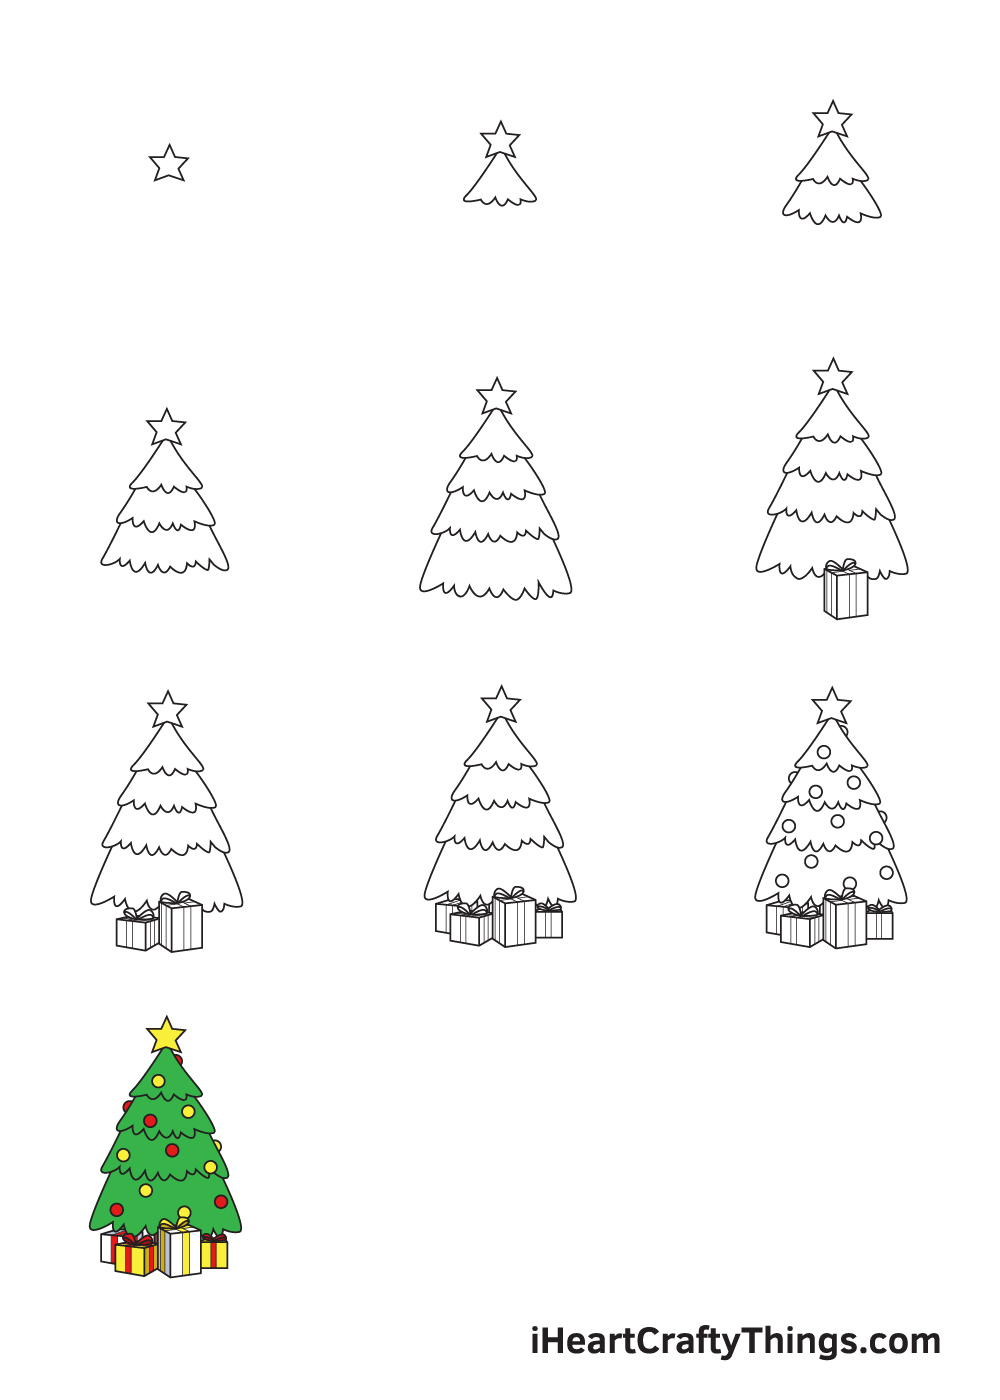
Step 1: Draw a Christmas Tree
Start by drawing a triangle for the basic shape of the Christmas tree. Then, add a line at the bottom of the triangle to represent the trunk.
Next, draw a series of short, horizontal lines inside the triangle to represent the branches of the tree. You can make the branches as long or short as you like, and you can vary the thickness of the lines to create a more realistic look.
Finally, add some decorations to your tree. You can draw ornaments, lights, or even a star on top of the tree.
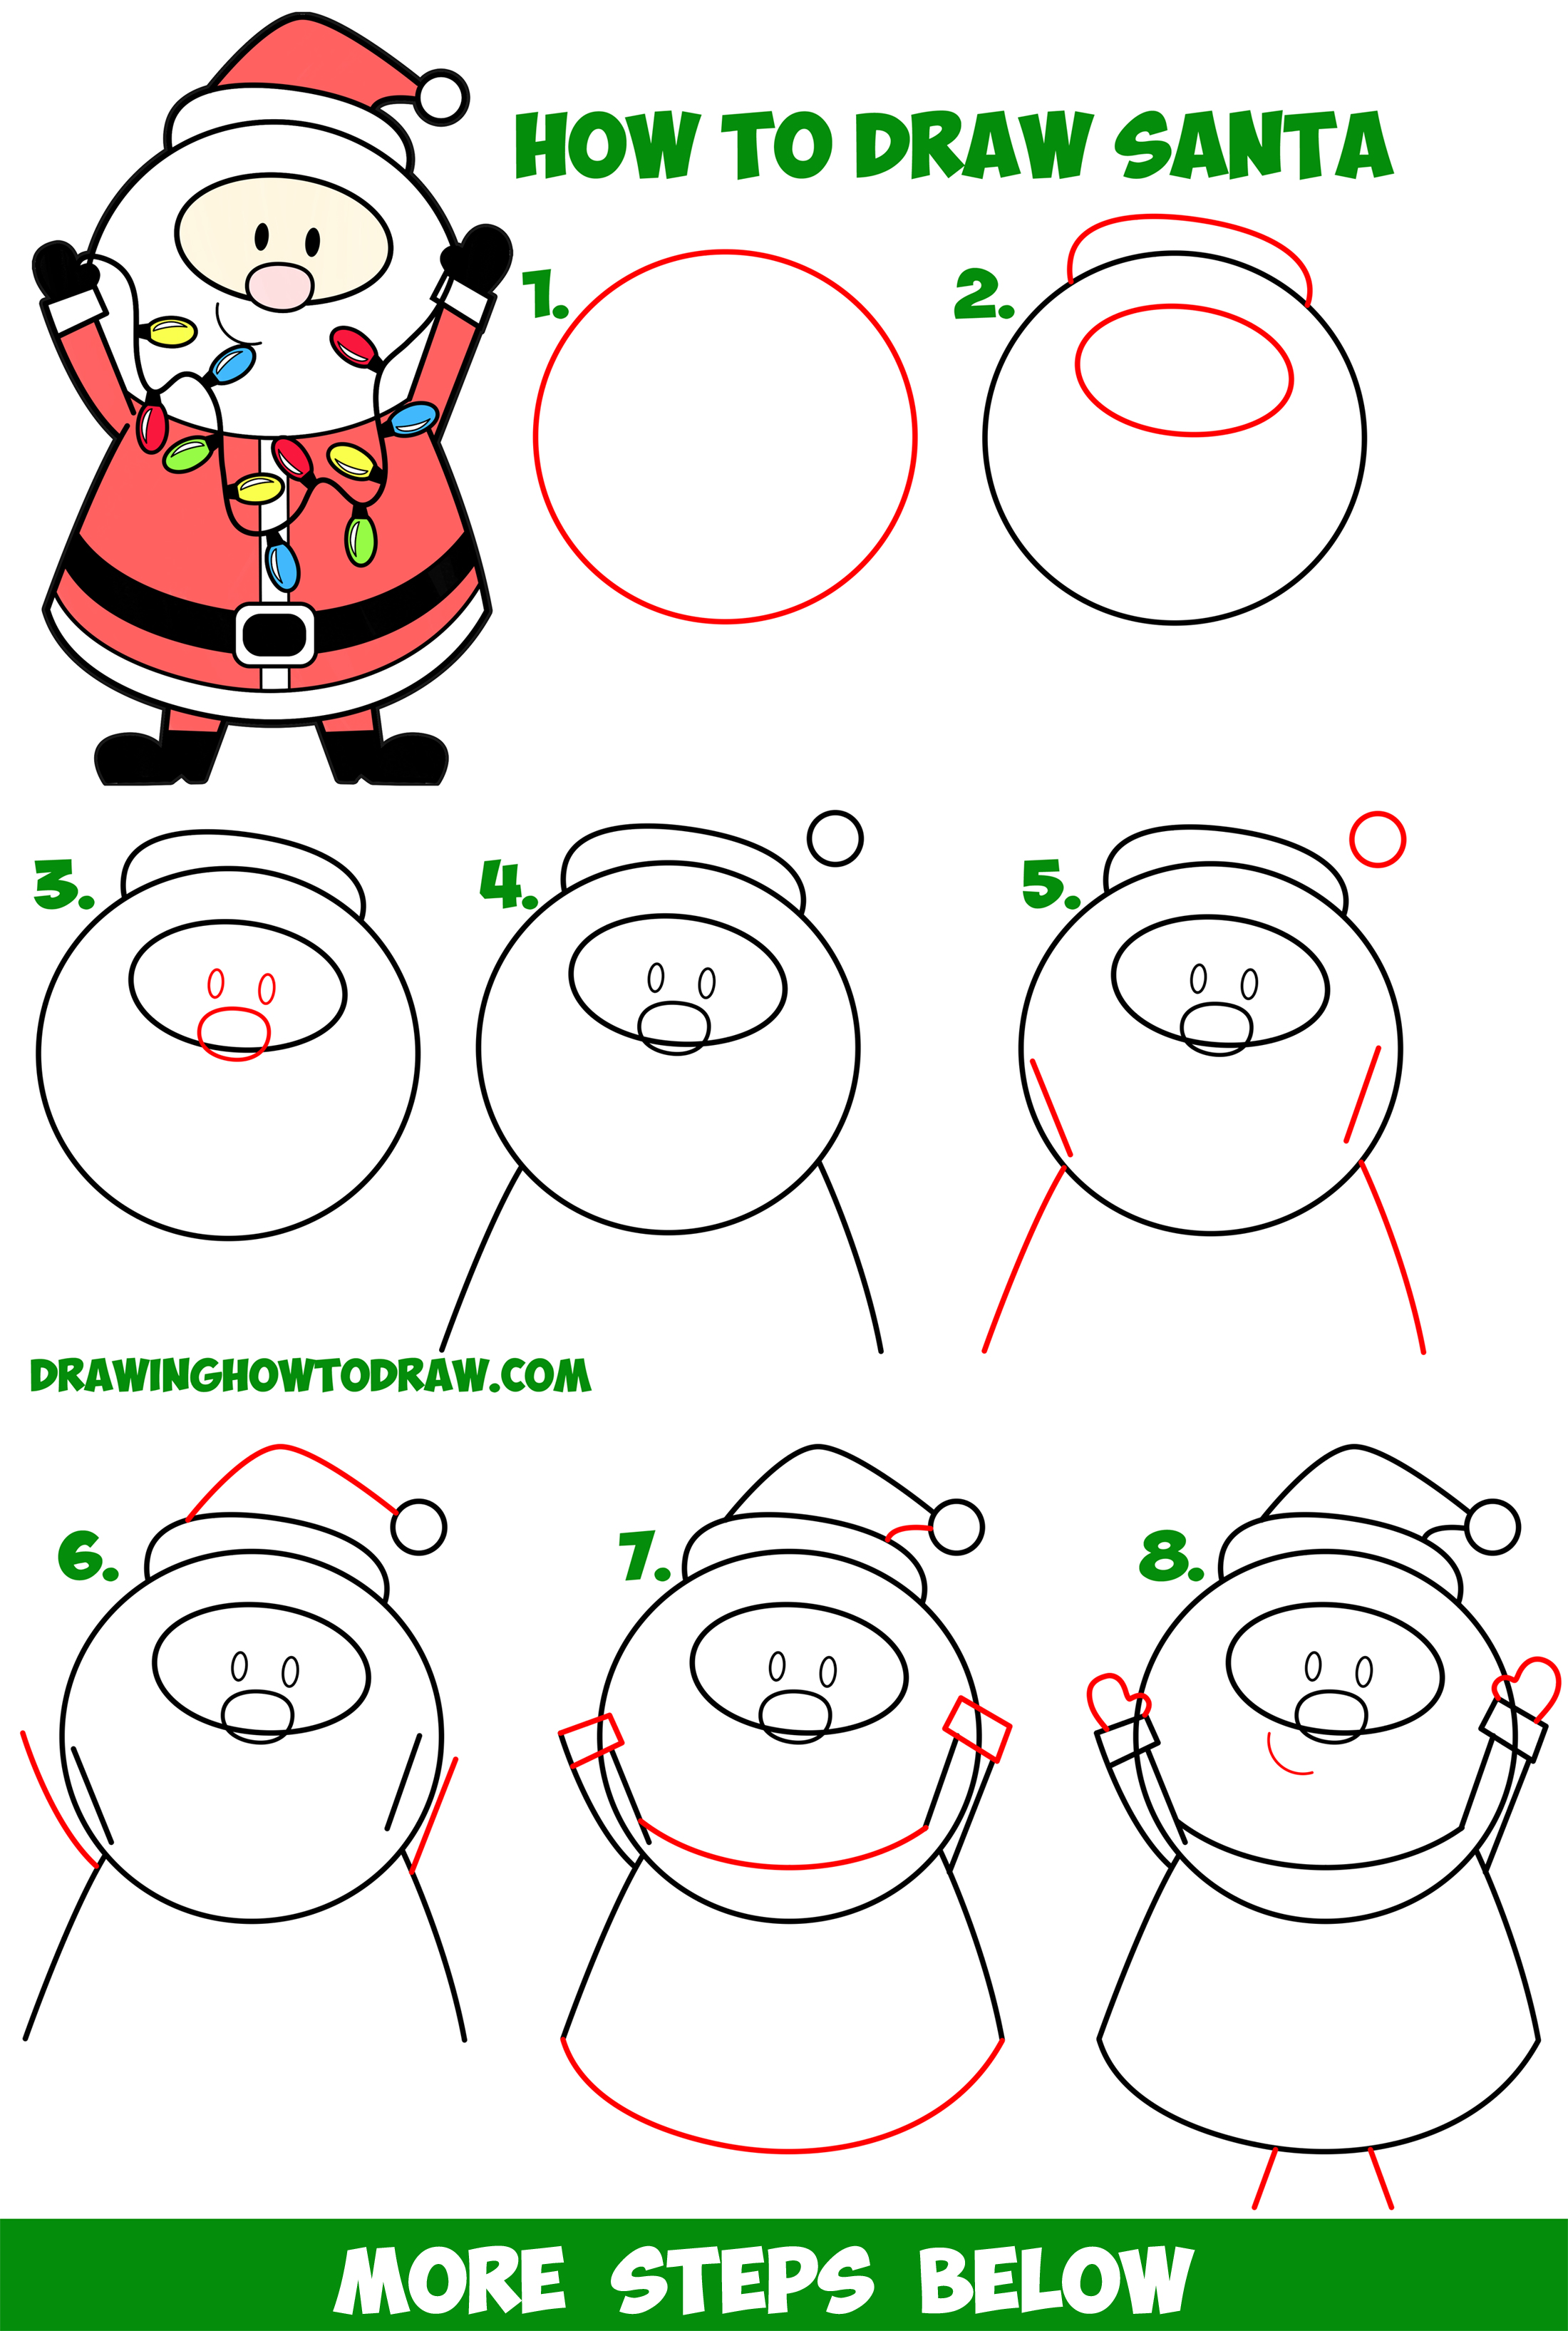
Step 2: Draw Santa Claus
Start by drawing a circle for Santa’s head. Then, add two smaller circles for his eyes and a curved line for his nose.
Next, draw a mustache and a beard around Santa’s face. You can make the mustache and beard as big or small as you like, and you can vary the thickness of the lines to create a more realistic look.
Finally, add a hat to Santa’s head and a scarf around his neck. You can also draw a sack of toys on Santa’s back.
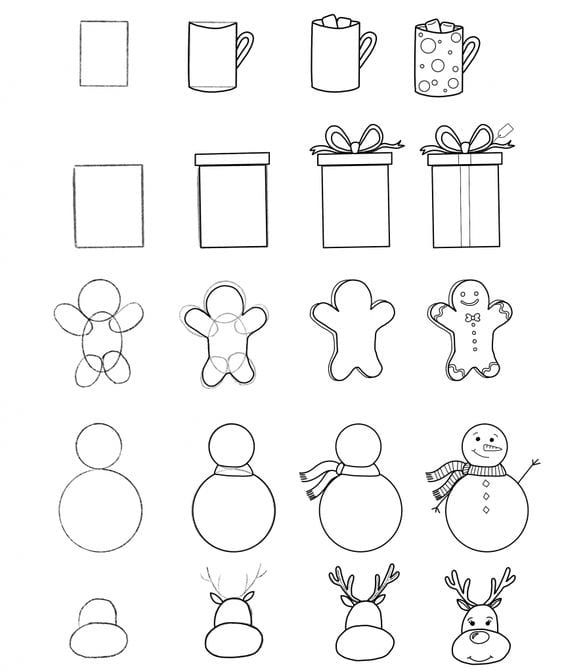
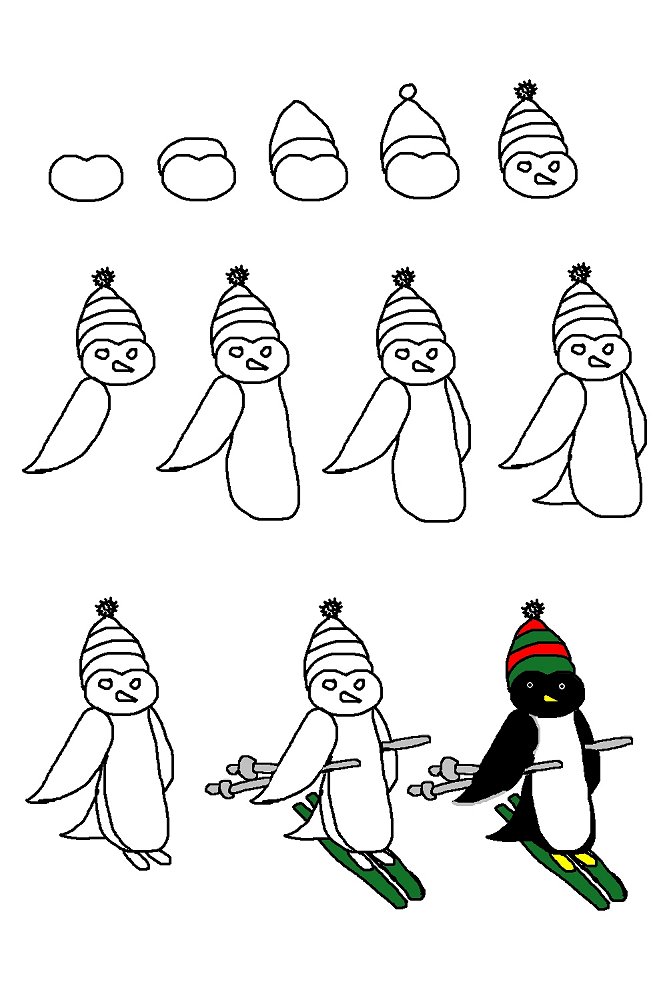
Step 3: Draw a Reindeer
Start by drawing a circle for the reindeer’s head. Then, add two smaller circles for his eyes and a curved line for his nose.
Next, draw two antlers on top of the reindeer’s head. You can make the antlers as long or short as you like, and you can vary the thickness of the lines to create a more realistic look.
Finally, add a body and legs to the reindeer. You can make the body as big or small as you like, and you can vary the thickness of the lines to create a more realistic look.
Step 4: Draw a Christmas Ornament
Start by drawing a circle for the basic shape of the ornament. Then, add a line at the top of the circle to represent the hanger.
Next, draw a series of lines inside the circle to represent the decorations on the ornament. You can draw stripes, polka dots, or any other design you like.
Finally, add some color to your ornament. You can use colored pencils or markers to make your ornament as bright and festive as you like.
Step 5: Draw a Christmas Gift
Start by drawing a rectangle for the basic shape of the gift. Then, add a line at the top of the rectangle to represent the ribbon.
Next, draw a bow on top of the ribbon. You can make the bow as big or small as you like, and you can vary the thickness of the lines to create a more realistic look.
Finally, add some color to your gift. You can use colored pencils or markers to make your gift as bright and festive as you like.
Conclusion
We hope you enjoyed this step-by-step guide on how to draw Christmas images. With a little practice, you’ll be able to create beautiful Christmas drawings that will add a touch of holiday magic to your home. So grab your pencils and paper, and start drawing!
Here are some additional tips for drawing Christmas images:
- Use a light touch when drawing the pencil lines. This will make it easier to erase any mistakes.
- Don’t be afraid to experiment with different colors and designs. The more creative you are, the more unique your Christmas drawings will be.
- If you’re having trouble drawing a particular image, try looking at a reference photo. This will help you get the proportions and details right.
- Once you’re happy with your drawing, you can add some color using colored pencils or markers.
- Frame your finished drawing and hang it on the wall to add a touch of Christmas cheer to your home.


Closure
Thus, we hope this article has provided valuable insights into Christmas Images Drawing Easy 2024: A Step-by-Step Guide for Beginners. We thank you for taking the time to read this article. See you in our next article!